Frontend Developer Roadmap

A software developer from Ghana who aspires to make a significant impact in the tech industry.
Welcome to the ultimate guide to kickstarting your journey as a front-end developer. Uncover the foundational steps and essential know-how to pave your way to success in the ever-evolving world of web development.
This is the guide for you if you're looking to:
Start your career as a front-end developer and jump into the market right away.
Improve your skills and career to acquire a higher-paying job - If you are an intermediate-level programmer
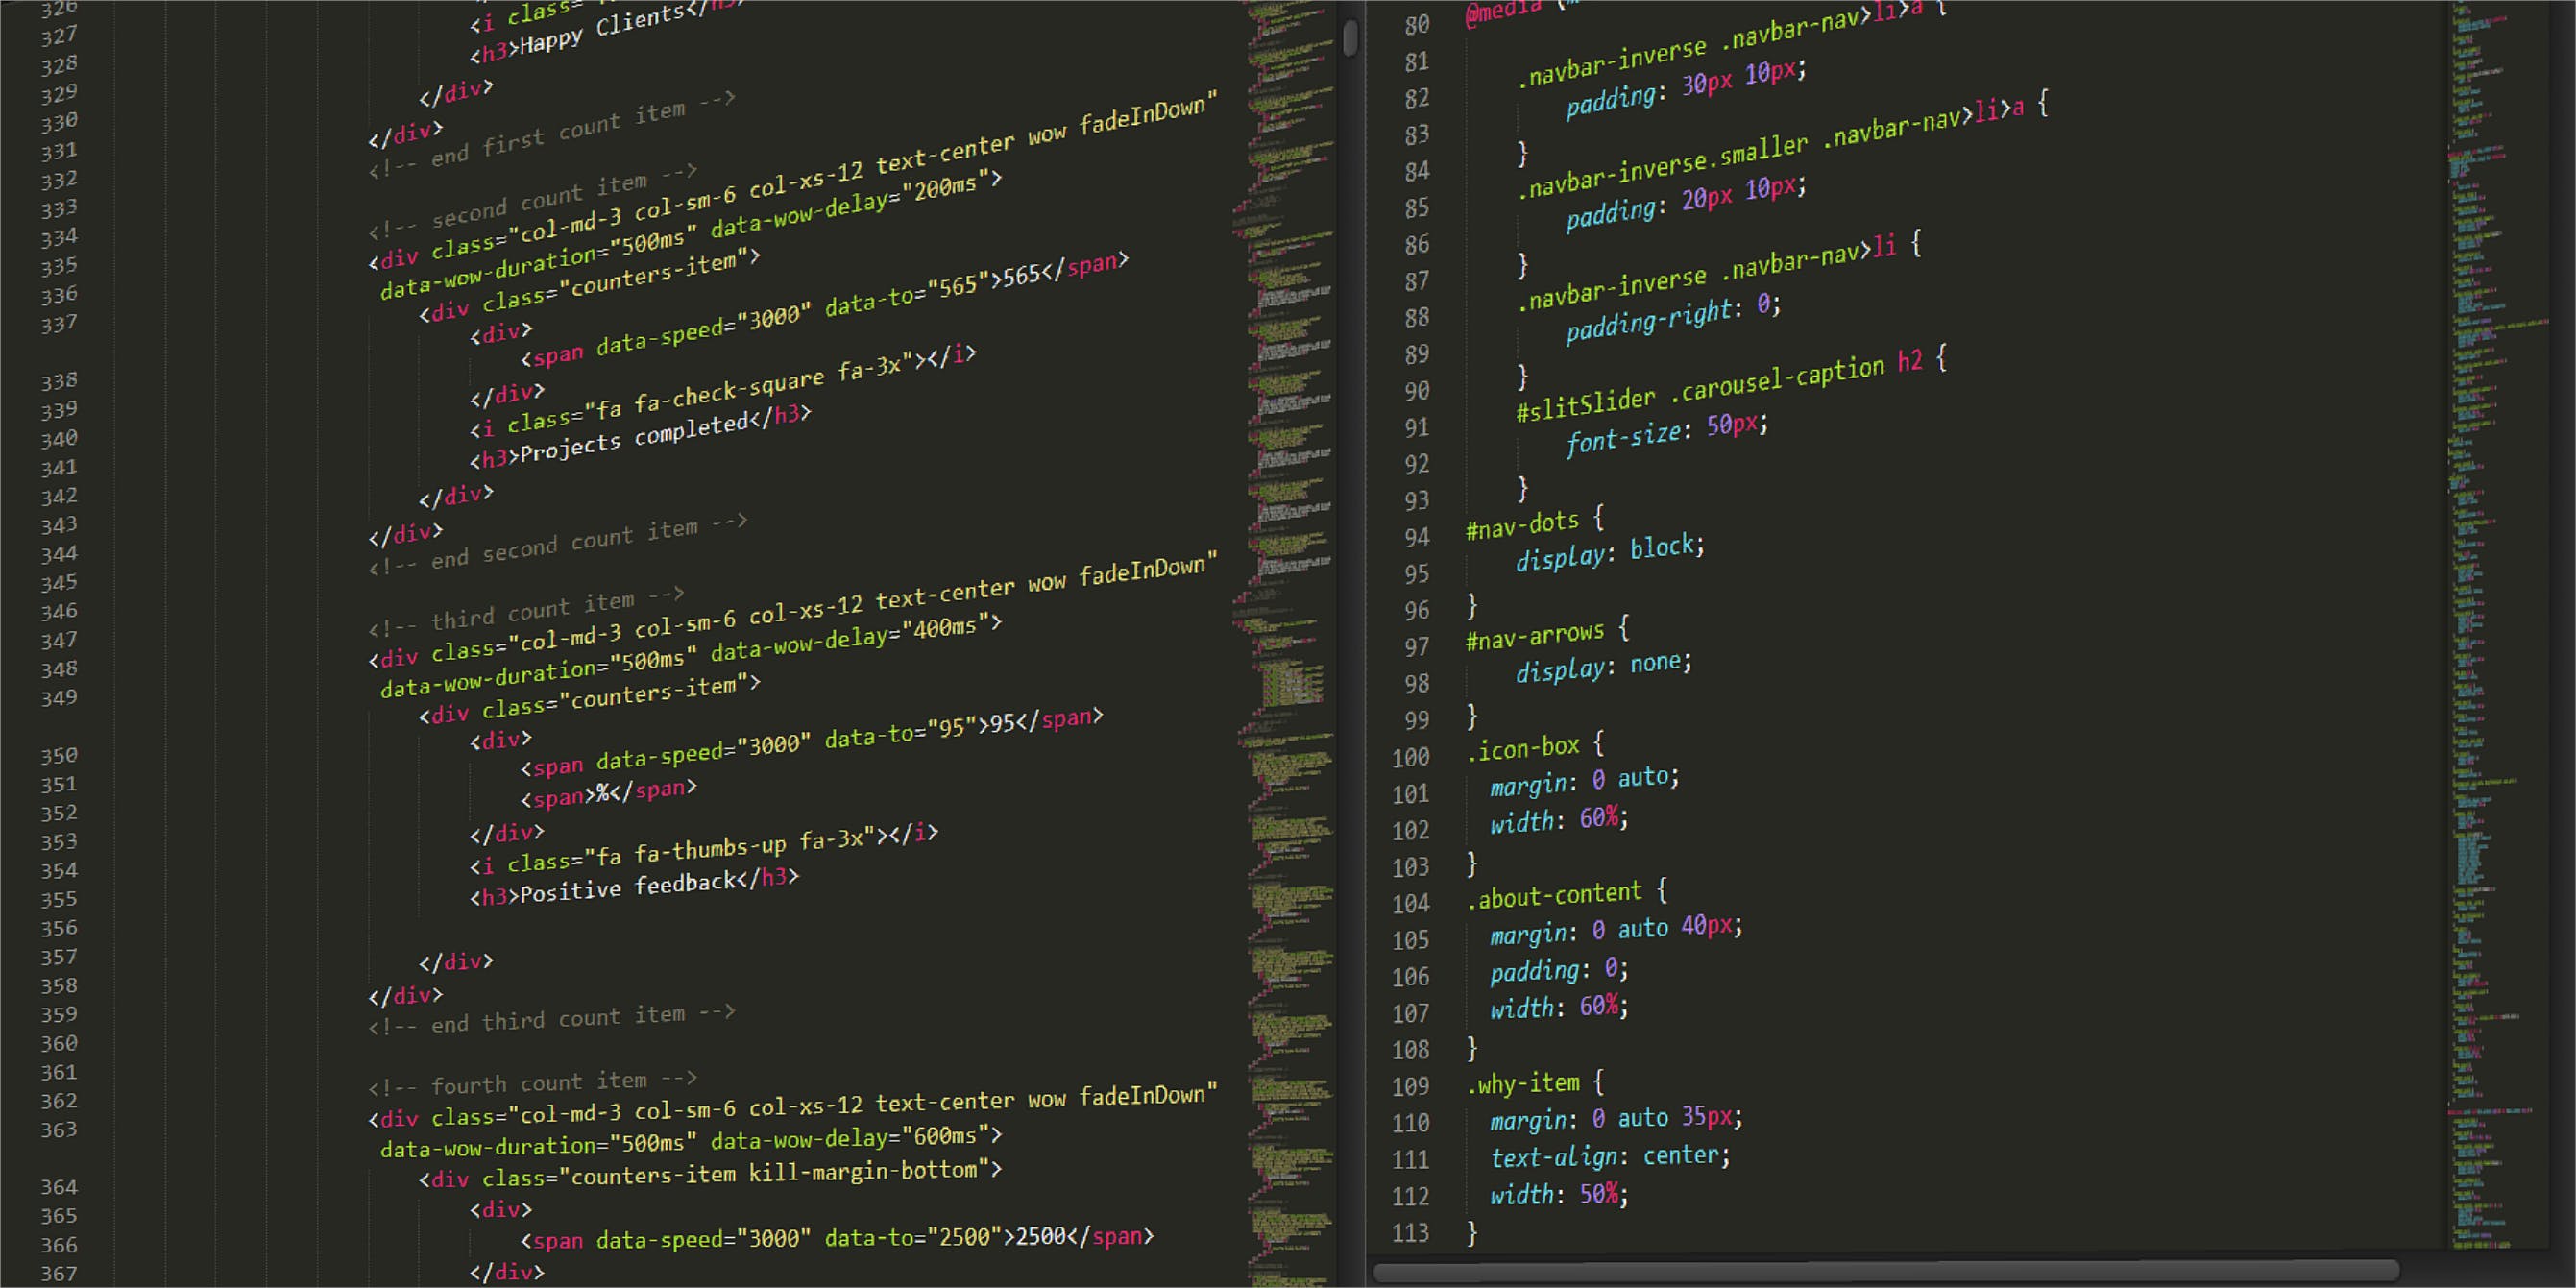
Front-end development also known as client-side development, involves building the User Interface (UI) of a website or a web application, that determines how every part of a website will look and how it will work. whenever you visit a website - the different types of buttons and other UI components, media, texts, forms and animations are all developed as a component of the front-end.
A Front-End Developer works by creating the user interface of a website or an app. They are not only in charge of building the UI but also:
They ensure a balance between design and functionality, as well as speed and scalability.
They ensure search engine optimization (the process of getting a website to rank higher in search engines such as Google).
They also ensure that the website loads correctly on all browsers (cross-browser), on different operating systems (cross-platform), and on different devices like mobiles, tablets, and computer screens (cross-device).
Fundamentals of Front-end
The key fundamentals of front-end development include HTML for structure, CSS for styling, and JavaScript for interactivity. These skills are the bare minimum to start with Front-End Development. Front-end is not just limited to HTML, CSS, and JavaScript. There are many other skills that you will need to learn to excel as a front-end developer. Now let's dive deep into these skills
HTML
HTML stands for Hypertext Markup Language. it is the standard markup language used for creating web pages and web applications. It provides a structure or skeleton for the content of a webpage by utilizing various tags and attributes to define and display the content, such as text, images, links, and multimedia.
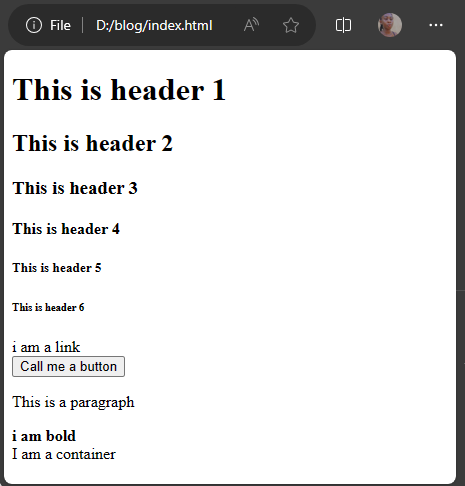
The snippet below shows the HTML syntaxt and some tags
<!DOCTYPE html>
<html lang="en">
<head>
    <meta charset="UTF-8">
    <meta name="viewport" content="width=device-width, initial-scale=1.0">
    <title>Demo</title>
</head>
<body>
  <h1>This is header 1</h1>
  <h2>This is header 2</h2>
  <h3> This is header 3</h3>
  <h4 class="heading">This is header 4</h4>
  <h5 class="heading">This is header 5</h5>
  <h6 class="heading">This is header 6</h6>
  <a id="paragraph">i am a link</a> <br/>
  <button>Call me a button</button>
  <p>This is a paragraph</p>
  <b>i am bold</b>
  <div>I am a container</div>
</body>
</html>
A brief explanation of the code above
<!DOCTYPE html>: This declaration specifies the version of HTML that the webpage is using, which in this case is HTML5.<html lang="en">: This tag defines the beginning of the HTML document. Thelangattribute indicates the language of the document, with "en" representing English.<head>: The head section contains meta information about the document, such as the document's title, character set, and viewport settings. It doesn't display any content on the webpage.<meta charset="UTF-8">: This meta tag specifies the character encoding for the HTML document, ensuring that the browser interprets the text correctly.<meta name="viewport" content="width=device-width, initial-scale=1.0">: This meta tag configures the viewport for mobile devices, ensuring that the webpage is rendered properly on different screen sizes.<title>Demo</title>: The title tag sets the title of the webpage, which is displayed in the browser's title bar or tab.<body>: The content between the opening and closing body tags ( … ) contains the elements that will appear on the screen.<h1>,<h2>,<h3>,<h4>,<h5>,<h6>: These tags create headings of different sizes, with<h1>being the largest and<h6>being the smallest.<a>: This tag creates a hyperlink or anchor that can be clicked to navigate to another webpage or a specific location within the same webpage.<br/>: The line break tag creates a line break in the text, allowing content to appear on separate lines.<button>: This tag creates a clickable button that can act when clicked, such as submitting a form or triggering a JavaScript function.<p>: The paragraph tag is used to define a paragraph of text, creating a block of content with a space above and below it.<b>: Renders the enclosed text in bold.<div>: The div tag is a generic container that can be used to group various elements or to define a section of the webpage for styling or scripting purposes.the
classis a CSS attribute. It is used to assign a specific styling to one or more HTML elements or for targeting those elements with JavaScript.The
idattribute provides a unique identifier for an HTML element, which can be used for specific CSS styling or for targeting the element with JavaScript.if you preview the code above in a browser this is what you get
CSS
CSS or Cascading Style Sheets, is a style sheet language used to describe the presentation of a document written in a markup language like HTML. It defines how elements should be displayed on the screen, including their layout, colors, fonts, and other visual aspects, enabling developers to create visually appealing and user-friendly web pages.
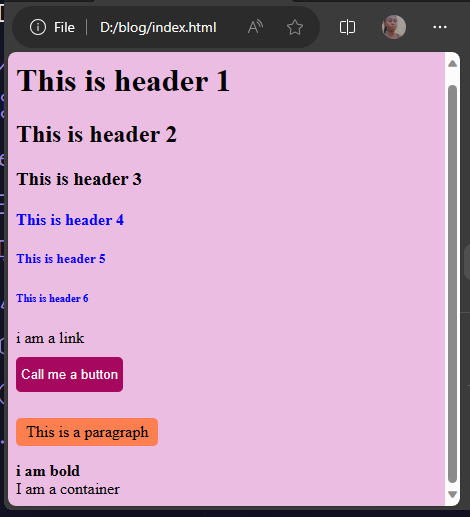
Let's add a bit of CSS to our previous code and see what we get
body{
    background-color:rgb(236, 189, 226)
}
.heading{
    color: blue;
}
button{
    background-color: rgb(165, 8, 94);
    margin: 10px 0;
    padding: 10px 5px;
    color: white;
    border: none;
    border-radius: 5px;
}
#paragraph{
    background-color: coral;
    padding: 5px 10px ;
    width: fit-content;
    border-radius: 5px;
}
let's get an understanding of the code
body: This selector targets the entire body of the HTML document and sets the background to RGB(236, 189, 226).heading: This selector targets all elements with the class "heading." it can be applied to multiple HTML elementsbutton: This selector targets all<button>elements and apply styles to it.#paragraph: This selector targets the element with the ID "paragraph". It can be applied to only one HTML elementthis is how lively our site looks after adding the few styles above
When it comes to CSS you need to get a solid understanding of these concepts:
Selectors and cascading:Understand how to target specific HTML elements using their classes, Ids or tag names and apply styles to themBox model:Understand the layout of the box model including how to calculate the width, height, border, padding and margin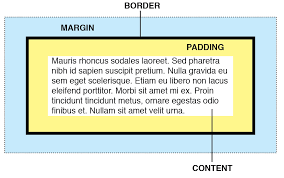
Display and positioning:Learn how elements are displayed on a page such as a block, inline, grid etc. Understand how elements are positioned in relation to other elements (fixed, static, sticky, relative, absolute)Colors and backgrounds:Understand how to set colors, gradients, and background images, and how to use them effectively to enhance the visual appeal of your web pages.Responsive design and media queries:Master the art of creating fluid and adaptable layouts that can seamlessly adjust to different screen sizes using media queries.Transitions and animations:Learn how to add engaging visual effects to elements, such as hover effects, fades, and keyframe animations, to improve user experience and interactivity.Browser compatibility:Ensure that the design, layout, and functionality of the website remain intact and user-friendly irrespective of the browser or device used to access itFlexbox and Grid layouts:Understanding the basics of flexbox and grid layout, which are CSS layouts that allow you to create complex, responsive designs with minimal code.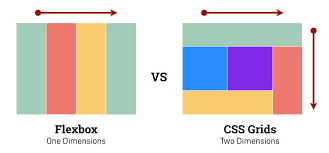
CSS FRAMEWORKS
Here are some popular CSS frameworks that you might consider learning. Master at least one of them
Tailwind CSS (Recommended): A utility-first CSS framework that provides a set of low-level CSS utility classes that can be combined to build any design. It is a highly customizable framework that gives developers complete control over the look and feel of their websites and applications. Tailwind CSS is also highly responsive, meaning that websites and applications built with Tailwind CSS will look great on any device, regardless of screen size. This is because Tailwind CSS provides a set of responsive modifiers that can be used to adapt the layout and styling of elements based on the screen size.
Bootstrap: It is a free and open-source CSS framework for developing responsive, mobile-first websites. It is one of the most popular CSS frameworks in the world, Bootstrap provides a collection of HTML, CSS, and JavaScript components and utilities that can be used to build websites quickly and easily. These components include buttons, forms and navigation bars. Bootstrap also provides a grid system that can be used to create responsive layouts that will look great on all devices.
Storybook: It is an open-source tool for developing UI components in isolation. It allows you to build, test, and document your UI components in isolation. This can help you to create more consistent and reusable UI components, and it can also make your code easier to maintain. Storybook works by rendering your React components in a sandbox environment. This means that you can test and develop your components without having to worry about the rest of your application.
Material UI: An open-source React component library that implements Google's Material Design. It provides a wide range of pre-built components that are ready for use in production right out of the box, including buttons, menus, forms, tables, dialogs, and more. Material UI components are beautiful, responsive, and accessible by default, and they can be customized to meet the specific needs of your project
JAVASCRIPT
JavaScript stands as a key player in the world of front-end development. It is the language that makes all the interactivity on your favorite websites possible. For example, when you click a button on a website, JavaScript is what makes the button perform the desired action. Also when you type something in a search bar, JavaScript is what updates the search results in real-time
Here are the most important concepts you need to grasp:
Variables(var, let, const)
Primitive and Non-Primitive data types
Understand the concept of scope
Operators and conditional statements
Functions and Arrow functions
Objects
Arrays
DOM manipulation
ES6 modules
REACT JS
React JS is a JavaScript library for building user interfaces. It is widely used in the development of single-page applications (SPAs) and complex web interfaces. Here are some reasons you should learn React JS:
Popular and in-demand. React is one of the most popular JavaScript libraries in the world. It is used by companies of all sizes, from startups to Fortune 500 companies examples of website built on React includes Airbnb, Netflix, Facebook, Discord, and Twitter. This means there is a high demand for React developers.
Reusable components: One of the key features of React is that it allows you to build your user interface using reusable components, which makes it easy to build and maintain large and complex applications.
Fast and Performant. React uses a virtual DOM to efficiently update the UI. This makes React UIs very fast and responsive.
Large community and ecosystem. React has a large and active community of developers who contribute to the library and create new tools and resources. This means that there is a lot of support available for React developers.
Easy to learn. React has a relatively shallow learning curve. If you already know JavaScript, you can learn React in a short amount of time.
REDUX
Redux is a JavaScript state management library that is most commonly used with React, but it can also be used with other JavaScript libraries or frameworks. It is a predictable state container for JavaScript apps, and it helps you write applications that behave consistently, run in different environments, and are easy to test.
Here are some of the key benefits of using Redux:
Predictability: Redux's state is immutable, meaning that it can never be changed directly. This makes it easy to reason about how your app will behave, and it also makes it easier to test your app.
Centralization: Redux stores all of your application's state in a single place. This makes it easy to share state between different parts of your app, and it also makes it easier to debug your app.
Debuggability: Redux DevTools make it easy to trace when, where, why, and how your application's state changed. Redux's architecture lets you log changes, use "time-travel debugging", and even send complete error reports to a server.
NEXT JS
Next.js is a framework built on top of React.js, which makes it easy to create server-rendered React applications with automatic code splitting and SEO-friendly optimized performance.
Here are a few reasons why you might want to learn Next.js:
Improved performance: Next.js utilizes techniques like static site generation (SSG) and server-side rendering (SSR) to enhance the performance of React applications. This results in faster page loading times and a better user experience.
Simplified routing: Next.js provides a built-in router that makes it easy to define routes and handle URL changes in your React application. The router also supports dynamic routing, which allows you to create routes with variable parameters.
Automatic code splitting: Next.js automatically splits your code into smaller bundles, which are loaded on demand as the user interacts with the application. This reduces the initial page load time and improves overall performance.
Pre-rendering and data fetching: Next.js simplifies the process of pre-rendering and data fetching, which are essential for SEO and performance optimization. It provides built-in support for various data-fetching methods, including
getStaticPropsandgetServerSideProps.API routes: Next.js allows you to create API endpoints directly within your React application using API routes. These API endpoints can be used to fetch data from external sources or perform server-side operations.
TYPESCRIPT
TypeScript is a superset of JavaScript. It is designed for the development of large applications and transpiles to JavaScript. It provides many features that can help you write robust and scalable applications.
Here are some of the key benefits of using TypeScript:
Static typing: TypeScript allows you to specify the types of variables, function parameters, and return values. This can help you catch type-related errors at compile time rather than runtime.
Better code readability and maintainability: TypeScript's type annotations make your code more self-documenting and easier to understand, which can improve code readability and maintainability.
Compatibility with JavaScript: TypeScript is a superset of JavaScript, which means that all JavaScript code is valid TypeScript code. This makes it easy to migrate existing JavaScript code to TypeScript.
Large community: TypeScript has a large and active community, which means that there are many resources available to help you learn, and many other developers you can turn to for help and advice.
REACT TESTING LIBRARY
Jest is a JavaScript testing framework that is easy to use and provides a comprehensive set of features for testing React components. Here are some reasons you might want to learn Jest:
Ease of use: Jest has a simple API and comes with a built-in test runner. This means that you can start writing tests right away, without having to spend a lot of time learning how to use the framework.
Snapshot Testing: Jest's snapshot testing allows you to capture a "snapshot" of your component's output and compare it with the previous snapshot. This simplifies the process of detecting unexpected changes in the UI.
Speed and performance: Jest runs your tests in parallel, which can make your test suite run much faster. Jest also has a fast and efficient testing engine that can run your tests quickly and in memory, so you don’t need to start up a browser or a Node.js process.
Large Ecosystem: Jest has a large and active community, which means that there are many resources available to help you learn how to use the framework and solve any problems that you may encounter.
GIT
Git is a distributed version control system (VCS) that allows you to manage and track changes to your source code. GIT allows multiple developers to work on a project simultaneously while ensuring that their changes do not interfere with one another.
APIS
As a front-end developer, when you get deeper into building the visual part of websites, you will want to integrate external data into your app. In that case, you'll need to employ APIs to achieve your goal. As a result, it is important to understand the fundamentals of how APIs work.
CONCLUSION
In conclusion, embarking on the front-end development journey involves mastering the trio of HTML, CSS, and JavaScript, expanding into frameworks, refining design skills, and embracing tools for optimal performance. Keep in mind that this roadmap to becoming a front-end developer is merely a guideline for learning, not concrete rules. Web tools and technologies are constantly evolving, so it's crucial to stay up-to-date and reskill to stay ahead of the curve.

